

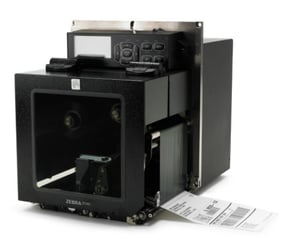


ZEBRA Thermal Printer Troubleshooting Tips and Tricks
Updated: June 2026
TOP 5 Common issues with zebra thermal printers and how to fix
- Poor Print Quality
- Skipping Labels
- None of the settings save
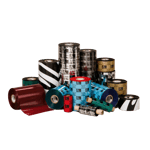
- Wrong type of ribbon and paper
- Poor or low barcode ANSI grade
During my 20 years of troubleshooting zebra printers, I have found that the same problems arise over and over again. These issues carry through to all thermal printer models in the zebra family. I am going to walk through some quick Zebra troubleshooting tips and, hopefully, save you some time and frustration when you find that your printer isn’t performing like it should.
BEFORE ANYTHING, CLEAN THE PRINTER
The very first thing I do when troubleshooting zebra thermal printer issues in every situation, no matter what, is to thoroughly clean the entire printer. This seems like common sense, but you’d be surprised by how many printers are neglected until something effects operation. Adhesive and residue builds up on the printhead and platen rollers. Dust and particles block sensors field of view. We recommend cleaning the printhead, all the rollers, and sensors with 99.7 % isopropyl alcohol every time you change the media. Inspect the platen roller (underneath printhead) and make sure there are no cuts in it or labels wrapped around it. Cuts in the platen will create voids in the print and will need replaced. The external cover is designed to keep the printer clean! It seems like 50% percent of the places I go into run their printers with the cover up all the time. This just leads to more down time.
RUN A PAUSE TEST PRINT
Right after I’m done cleaning, I’ll run a pause test print. This sends a test label to the printer and isolates the printing function from the software running a normal print job. To do this: turn the printer off, hold in the pause button, and turn the printer back on. Keep the pause button pressed until all the lights flash once. This will load 9999 test print labels into the printer. Release pause and you are ready for troubleshooting. Pause test is the best way to quickly determine if the printer is functioning properly. It also prints across the entire capable width of the printer which will help you better fine tune your adjustments.
POOR PRINT QUALITY
How is the quality of the print? Print quality is greatly affected by darkness and speed. The slower the print the better the quality of the print image. I recommend taking the speed down as much as possible to ensure that you have the best possible image. After slowing down the print and you still have a light image, increase the darkness as much as possible. Too much darkness will melt the ribbon onto the label, your controlling the dwell of the print head. This is not actually a setting to change how much heat is applied. If you’re still not getting a good image check to make sure you have the right ribbon for the label material selected. Another good place to check to increase print quality is that you must have even pressure across the print head. There is a toggle with spring above the printhead, make sure this is evenly space across the label, or if there is one you want to center it on the label. If there is a vertical white line through the print you have a bad print head element and the print head will need (to be) replaced. A white line running diagonally signifies a wrinkle in the ribbon. You can adjust this by fine-tuning the ribbon strip plate. Print head alignment could also cause feathering at the edges of the label. If you still can’t get a good label check if you have the right ribbon to label combination. I should also add, if you are not getting an image at all chances are that you have the ribbon loaded backwards. You can test what side the ink is on by sticking a label to the ribbon. If ink is transferred, you have the correct side.
SKIPPING LABELS
If your zebra printer is skipping labels, not feeding an entire label, or giving a paper or ribbon out error, then follow these steps. I always start with making sure the ribbon and labels are properly fed through the printer along the correct path. All zebra printers have guides on proper loading technique. Then, I run a general calibration by hitting pause and selecting the calibrate button. If you don’t have a calibrate button then you’ll need to look up the proper calibration procedure on Zebra’s website and you can find the instructions for the specific model printer in the links provided below. The printer will run through some labels calibrating the sensor to look for the gap between. If all is well, the printer will stop the final label at the peel edge. If it didn’t work, you’ll have half a label sticking out or an error and at this point double check the sensors to make sure they are unobstructed and clean. If they are good, I’ll run a manual calibration through the menu but if this doesn’t take care of the problem, I’ll run a sensor profile from the menu. A sensor profile prints out a graphical representation of what the sensors are seeing. The spike, which is measuring the gap, should be at least two points high. If it’s not you may need to replace a sensor and call LabelPack Automation for an evaluation.
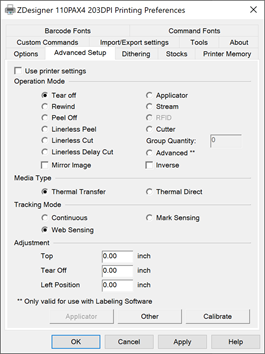
NONE OF THE SETTINGS SAVE
A common issue we see a lot is a complaint that none of the settings are saving on the printer. “When we make changes to the settings, they revert back to something else when we send a label.”
Labeling software or the print driver can change settings on the printer when the print job is sent. This often happens at facilities when a new label template is created or when a new employee is responsible for the printing. You can check this in the label properties of the template in whatever software you are using; Loftware, Bartender, NiceLabel, or Zebra Designer. Also, under printing preferences of the printer driver navigate to the advanced setup tab. Check use printer settings. This will keep the settings you make on the printer and not use settings from the driver or software. This is a good practice, so you don’t have to worry about someone forgetting to set all the printer settings when they configure a label.
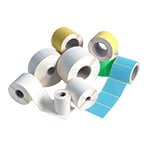
WRONG LABEL RIBBON COMBINATION
You must know what type of label material your using when selecting the proper ribbon. When selecting the proper ribbon you want durability of print and rub resistance.
A paper label prints best with a wax ribbon. Resin is added to the ribbon for durability. A film or polypropylene (synthetics) will need a full wax/resin combination ribbon. These types of labels have good moisture resistance. Polyesters require a full resin ribbon, used in long term and durable applications, UL or CSA label. A good tip to follow is that each ribbon performs best at certain darkness settings. If you’re not getting a good image at the expected darkness setting then you could possibly just have the wrong ribbon. Paper labels usually run around a 5-12 darkness setting. Film or polypropylene labels are going to be 15-25 range. Full resins are 20-30. Speed is also critical.
If you are unsure of label ribbon combination call LabelPack Automation for some guidance.
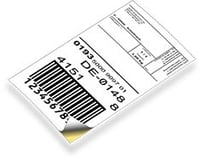
Poor or low barcode ANSI grade
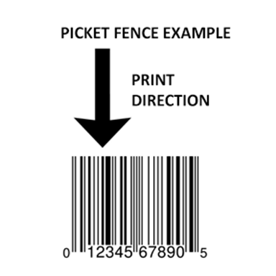
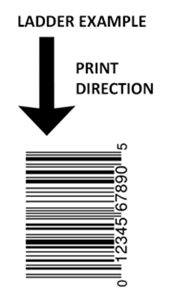
Another common issue is a poor ANSI grade on a barcode scan and some that won’t scan at all. A healthy print head is absolutely necessary in maintaining a quality barcode. A void in the barcode greatly effects the scan. Slowing down your print speed is always going to create a better image, eliminate poor edge’s and expanding barcode distortion. Scanners need good contrast. You always want to print your barcode parallel to the movement; we call this picket fence. When the lines of the barcode are perpendicular to the feed direction all kinds of problems with quality can happen. You won’t see a crisp print and a void in the printhead can go through the entire barcode. Another major barcode problem is a quit zone. A barcode that is right up to the edge of a label or directly next to any type of print will give you errors. A general rule is: there needs to be ten times the width of the narrowest bar of white space around the barcode.
Hopefully this general guide will help save you some time and frustration when troubleshooting your Zebra Thermal Printer. Please don’t hesitate to call LabelPack Automation with any thermal printer question. We provide phone support and evaluations of all Zebra printers. We provide depot service and help many customers onsite with service contracts. We manufacture all types of labels and labeling equipment. We have over 45 years of labeling and software integration. We are a Zebra trained and certified partner.
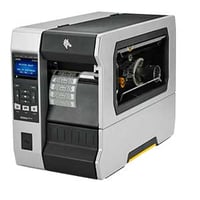
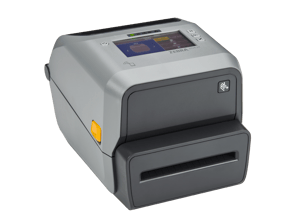
Common Zebra Models This Guide Applies To
This guide can help troubleshoot many Zebra desktop and industrial printers, including:
ZT411, ZT421, ZT410, ZT420, ZT610, ZT620, ZD421, ZD621, ZD420, ZD620, GK420d, GK420t, GX430t, ZE500, ZE511, and ZE521.
ULTIMATE ZEBRA PRINTER RESOURCE FOR TROUBLESHOOTING WITH VIDEO
https://www.zebra.com/us/en/support-downloads/printers.html